Gears, curves, doors, and electronics.
 Ok, so its been a while since my last post. Some of that time was waiting for new parts to arrive, but I've also been very busy. Things that have been changed: There's a roof prototype, gearbox has been stripped down and rebuilt, hopefully stronger, front grill hinge connected, right door prototype made, and I've made an emergency air release valve.
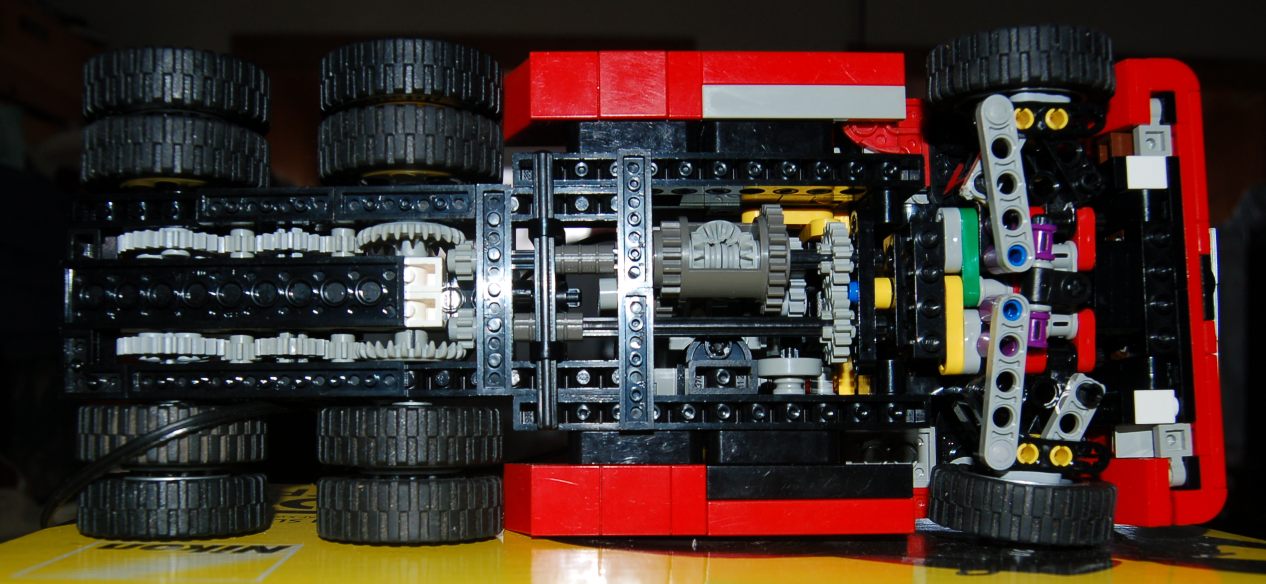 Over these weeks almost every available surface in this room has been covered in bricks - either from disassembled gearbox parts or an NXT project. (For those who are curious, its a Great Ball Contraption idea). Things are looking up now, but I still have to do Physics on my freaking bed.
- Roof -
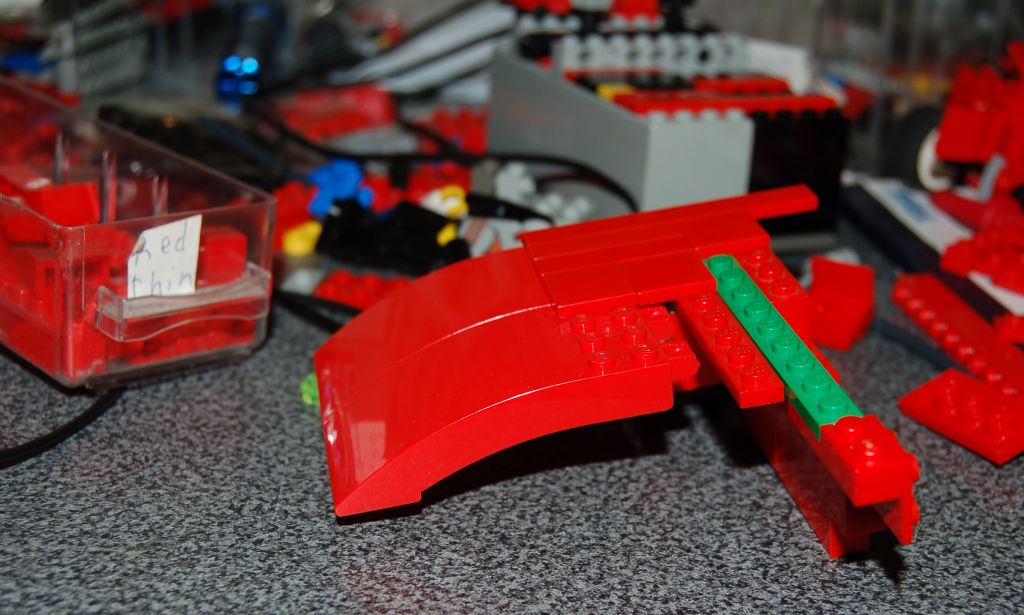 It's not perfect, but it's good for a first iteration. The biggest slope of about the right curvature is the 4x8x2 curve in red. It matches ok, but it's really not as gentle of a slope as on the real truck. Also, I won't be able to have a skylight, but I suppose that's what happens when you try and combine Legos with Curves. Maybe a sticker will suffice.
There is, unfortunately, another problem with these slopes. As I said they are 4M (1M = 1 stud) wide, and the truck itself is 14M. Lego makes a 2x8x2 curve brick also, but these only come in Reddish Brown and Dark Blue! Either I'll have to paint one of these or saw one of the larger parts in two. Neither of those options I relish - anyone have experience in this department?
Then there's the windshield. I could either go for the "Spotlessly Clean Windshield" technique (read: non-existent) or acquire a large amount of skill in bending polycarbonate plastic in a short period of time. Ideally it would curve at the corners to meet the door-frame, while matching the curve of a 1x2x1.3 tipped sideways.
On the actual truck above the windshield there is a sun-blocker thin metal sheet, usually with small orange lights. I suppose I'll slice up a Schwan's ice cream tub lid, color it with a silver Sharpie, and attach it to the truck somehow. And I'll just skip the lights entirely.
- Gearbox -
 I was very happy until I noticed it starting to grind its gears, despite my perfectly strong unbreakable patent pending ultimate gearbox structure design. Boo. Luckily, although there were piles of pneumatics and motors in the cab, on top of the gearbox, this is a tilt-cab vehicle. And because it's Lego, you can detach the cab entirely. (Note: this will be more difficult once pneumatics and electronics are running through the hinge.)
Once freed of the tinkering hindering cab, I could detect the guilty gears with the aid of my trusty mini-maglight. In the end the changes were very small, but the journey was long and difficult. Only time will tell if it is strong enough now. Basically, the gears are held together with a small (but relatively large) studless assembly, which is held to the frame only by two studs.
It's a whole different ball-game when you're rebuilding with extremely strict restrictive limitations for size and attachments. There has to be room for the stair wells, steering motor, frame, and pneumatic shifter. On top of that, the distance between 24z and 16z is very studless incompatible. (Exactly 3 layers, rather than 2 and 2/3.)
In order to withstand the torque of two geared motors stalled in low-gear, everything needs to be quite strong and therefor bulky. Hopefully this won't compromise cornering with trailers too much.
- Bodywork -
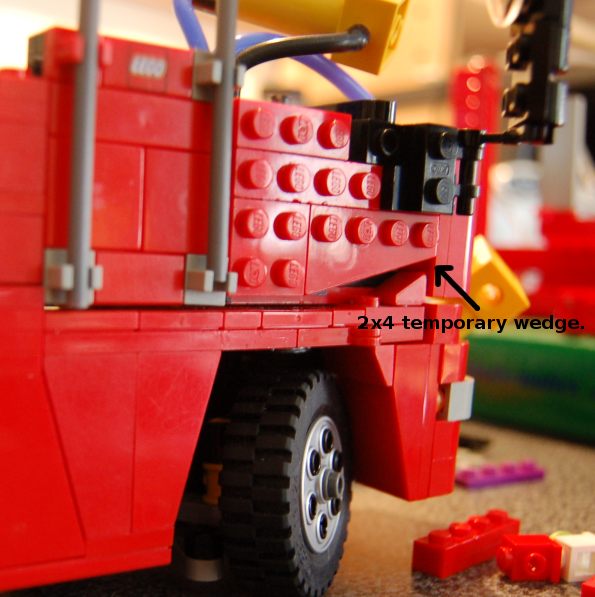 Its finally far enough along to try out some doors.Nothing is perfect yet, but it will probably stay close to the way it is now for a while. The doors are mounted, studs out, onto the nose pieces, also studs out. This works amazingly well, for something I was just playing around with. The doors have a slight curve in the front corner just like the real truck. These are also needed in order to have clearance over the studs below, holding the staircase hinge. To make this curve, on the studs-out doors, I need to use 3x2 wedge plates. These don't match the curve and make it impossible to tile the door, but its the best I can do. Maybe a solution will show up later.
On each door is a lever which pulls a pneumatic switch to open the stairs corresponding with the door. With lots of leverage, the stress on the hinge and door from moving the switch is not large, but if necessary the switches can be modified. There are a couple ways to make switches move perfectly smoothly, from cutting off the back panel to replacing the little axle inside.
If I succeed in making a slick polycarbonate windshield, it will need windows on the doors to match. I have no idea how to attach these besides, ahem, glue, but I don't want to go there.
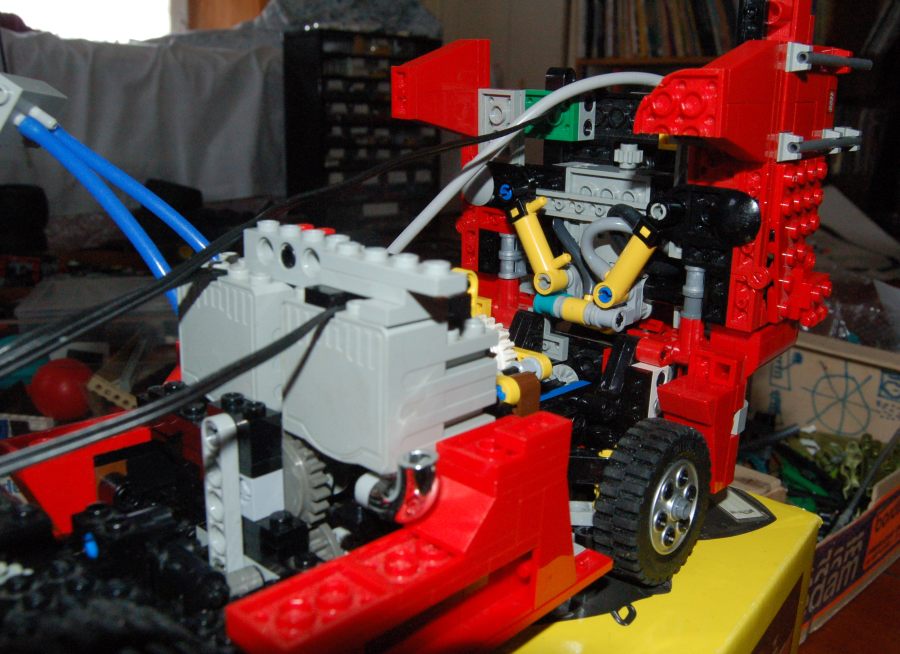
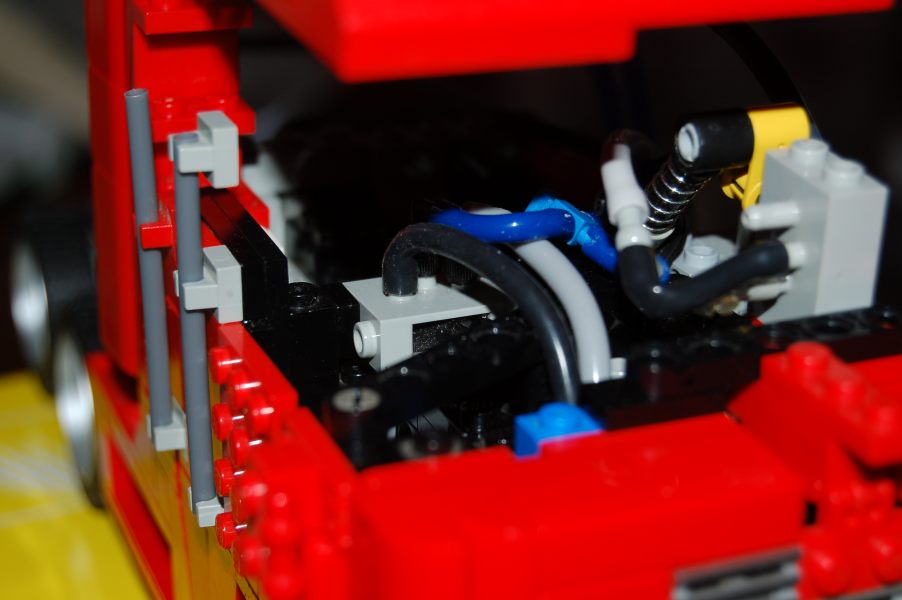 Inside the cab is a pneumatic switch with yellow handle attached to a spring. This is an emergency air release valve. It could be handy to release pressure if I won't be using the model for a while, and don't want it simply leaking out of all the pneumatic seals. Also, it makes a cool noise :-)
- Electronics -
There will be a single 9v battery (If it looses charge too fast and there is room, I could have two in parallel.) Everything will be controlled by a master switch inside the cab. Once on, the headlight LEDs will light up and power will flow the chip controlling the compressor.
This chip, a comparator, will turn the motor on and off based upon voltage used, thereby controlling air pressure. If I get it working. This is in lieu of having the standard lego pneumatic cylinder flip a polarity switch when it overpowers a rubber band. Such a system would be much too bulky to fit in the cab, as well as costing me another small cylinder.
If possible, I will install a voltage regulator on the hand-control. This will allow smooth acceleration and variable speeds. More on this later.
- Job List -
Then I get to position cab windows, decide if there are any decals that should be put on, and arrange lights and handlebars. The days are just packed.